Make your character talk by following these few easy steps. With the help of a character animator, the lip-syncing animation process can be completely automated.
Giving voice to your characters brings them to life. However, doing it the traditional way can be tedious. Fortunately, the process of making your characters talk can now be automated and it gives pretty good results.
Follow these 5 simple steps and you will instantly have a talking character.
This tutorial assumes you already have prepared and imported a character with the right hierarchy and mouth shapes into Adobe Character Animator.
Step 1: Record
For the character to talk it needs to have something to say. So the first step would be recording your audio. (Raw audio works best for lip-syncing).
What You Will Need:
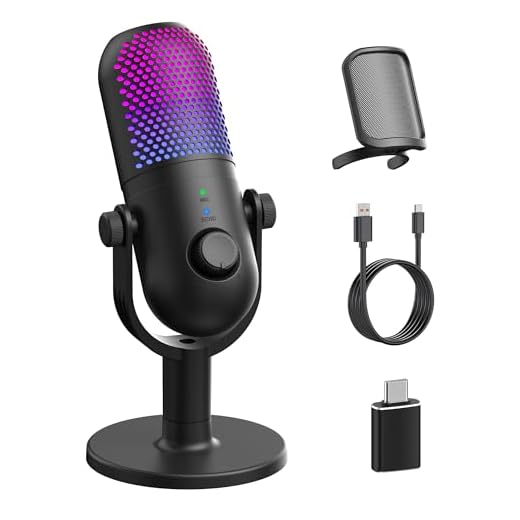
Microphone
Recording a perfect voice can be a bit of a complex process. It depends on the environment you record in and the equipment you use. And although getting a professional mic will make a great difference you can start with what you have for now. Yes, even if that means using the camera mic. You can read here all about the best practices when recording at home.
Recording Software
There are many free and premium software that will enable you to record your voice. The most straightforward way would be to use a voice recorder that comes with Windows. If you want to go with something more professional and have access to other apps in Adobe Creative Cloud *, you can use Adobe Audition app * for your recordings.
Alternative:
If you want to skip the recording step, it is possible to use online text to speech converters to generate an audio sample.
Step 2: Import the Audio File
Now it is time to import the audio file you created earlier into character animator software. Go to File and then click Import (or just use the Ctrl+L shortcut). Browse to the location you saved your recording and select the audio file from there.
Step 3: Add the Audio File to Your Scene
Now when the audio file is in your project, just drag it from the project panel into your scene.
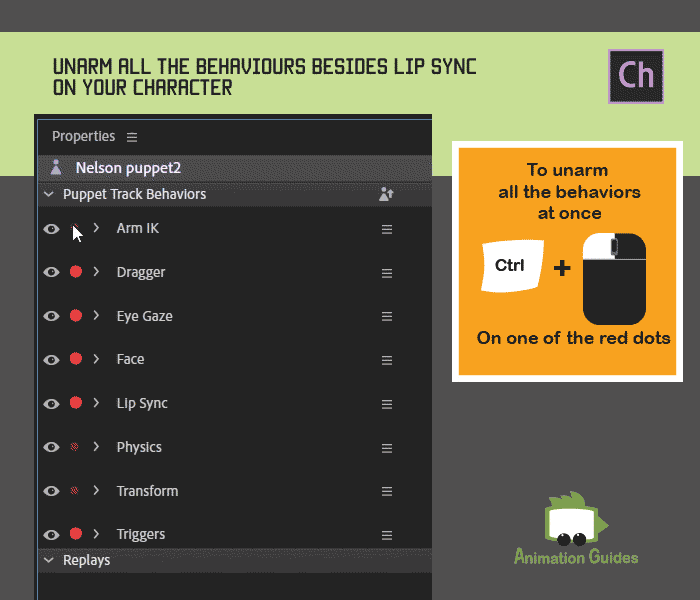
Step 4: Unarm Everything Besides Lip Sync
4a. Select your character in the scene timeline and unarm* all the behaviors at the properties panels. (*unarm = remove the red dots from the behaviors).
Clicking on the red dot near the behavior unarms it. To unarm all the behaviors at once just hold the Ctrl key on your keyboard (or Cmd key on Mac) and mouse click on one of the red dots.
4b. Arm the lip-sync behavior in the property panel. (You should now have a red dot near the lip-sync behavior).
Step 5: Compute the Lip Sync
Go to Timeline at the top menu and click Compute Lip Sync Take from Scene Audio. Wait a few seconds and you are done. Your character should be talking once you click play.
Hey!
I'm a CG artist, designer and illustrator. I love to explore different creative forms, media types and artistic styles. Feel free to write me with your ideas, suggestions or requests.
Hello,
I’ve followed all the steps above and it works fine. The problem is when I then try to record further takes for other behaviours the lip synch doesn’t work. It only works in play mode but not record.
Most likely you have all the behaviors armed during your recording, including the lipsync. In that mode, the Character Animator tries to lipsync your character to the new audio you may be recording. If you want to see the pre-created lipsync during the recordings of other new behaviors, just un-arm the lip-sync behavior (unarm = remove the red dot next to the lip-sync behavior). This way it will also not overwrite it. Hope it helps.
The technical process of lip-syncing in Character Animator is actually that easy. This post talks exclusively about the Character Animator part of the work. Obviously, the character art must contain mouth shapes. Those should be created in Adobe Illustrator or Adobe Photoshop.
I have a separate post discussing the required art structure for the puppet:
Once the art is structured correctly, following the above steps should produce a sufficient result.
There are advancements of course, like using cycle layers for better fluency, but that is not a necessary step.
Bob Brescia
5 years ago
How can you apply the same computed lip sync to several different puppets? I have two puppets with the same mouths and just want them to use the same lip sync data that I corrected after letting CH compute it.
Applying the same lip-sync on several puppets in Adobe Character Animator is actually very simple. You just need to copy and paste it.
1. Go to the scene timeline.
2. Select the puppet you already created the lip-sync for.
3. Click on the little triangle next to it to show all the created recordings.
4. Select the created lip-sync take and all the visemes.
5. Click Edit-Copy.
6. Select the New Puppet in the Timeline (You can select several puppets at the same time).
7. Bring the playhead to the same time the other puppets’ lip-sync started from.
8. Edit-Paste.
That’s it, your new puppet will have the lip-sync.
Shahriar
5 years ago
Thanks!
What the * means above
Please note, that the links that have * next to them are affiliate links and those help support AnimationGuides.com website. If you decide to purchase something through those links, we will get a small commission that will help us to continue and provide new free content on this website.
For you, going through those links is the same as clicking on a direct link. You will never pay more for products as a result of clicking on our links. If anything, that can actually help you get a better price since we can sometimes negotiate better deals for our readers.
The content on our website is not affected by the affiliate products and always reflects our honest opinion. All the reviews you will find on AnimationGuides.com are unbiased reviews. If a product we recommend does not have a supporting affiliate program, we will still link to it, just with a standard link without the *.


Hello,
I’ve followed all the steps above and it works fine. The problem is when I then try to record further takes for other behaviours the lip synch doesn’t work. It only works in play mode but not record.
B. Hi,
Most likely you have all the behaviors armed during your recording, including the lipsync. In that mode, the Character Animator tries to lipsync your character to the new audio you may be recording. If you want to see the pre-created lipsync during the recordings of other new behaviors, just un-arm the lip-sync behavior (unarm = remove the red dot next to the lip-sync behavior). This way it will also not overwrite it. Hope it helps.
here for this exact answer, thanks 🙂
Great, Glad to hear it was helpful
you’re leaving out a lot of steps
David Hi,
Not really.
The technical process of lip-syncing in Character Animator is actually that easy. This post talks exclusively about the Character Animator part of the work. Obviously, the character art must contain mouth shapes. Those should be created in Adobe Illustrator or Adobe Photoshop.
I have a separate post discussing the required art structure for the puppet:
https://www.animationguides.com/create-puppet-adobe-illustrator/
Once the art is structured correctly, following the above steps should produce a sufficient result.
There are advancements of course, like using cycle layers for better fluency, but that is not a necessary step.
How can you apply the same computed lip sync to several different puppets? I have two puppets with the same mouths and just want them to use the same lip sync data that I corrected after letting CH compute it.
Hi, Bob!
Applying the same lip-sync on several puppets in Adobe Character Animator is actually very simple. You just need to copy and paste it.
1. Go to the scene timeline.
2. Select the puppet you already created the lip-sync for.
3. Click on the little triangle next to it to show all the created recordings.
4. Select the created lip-sync take and all the visemes.
5. Click Edit-Copy.
6. Select the New Puppet in the Timeline (You can select several puppets at the same time).
7. Bring the playhead to the same time the other puppets’ lip-sync started from.
8. Edit-Paste.
That’s it, your new puppet will have the lip-sync.
Thanks!