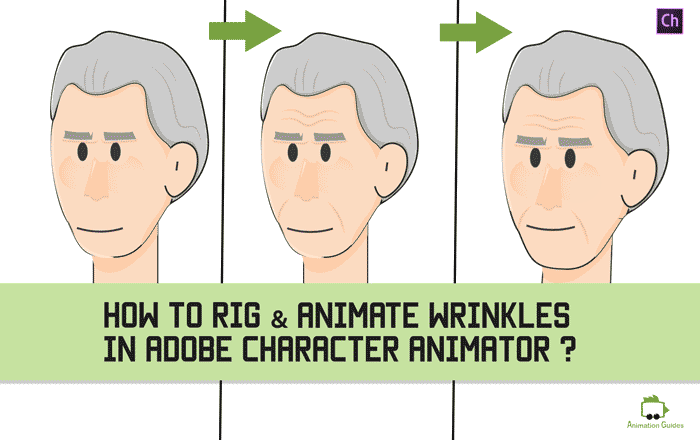
How Can You Create Animated Facial Wrinkles Automatically in Adobe Character Animator?
Facial wrinkles move and change their appearance as facial muscles move. This is a simple step-by-step process of rigging and animating facial wrinkles in Adobe Character Animator.
Adding wrinkles to character’s faces is the most common technique to make them look older.
We will divide facial wrinkles into two main groups. The forehead wrinkles and the oral wrinkles. We will cycle between the forehead wrinkles as the eyebrows move up and down. We will also add some local twists to make the movement look more natural. For the mouth wrinkles, we will also create several static options and attach each wrinkle variation to a mouth shape that will trigger that wrinkle state.
There are two main types of wrinkles. Wrinkles that form due to gravity and loss of skin elasticity and wrinkles that appear as a result of frequent facial movements.
All facial wrinkles move as the facial muscles move.
To understand the shape of wrinkles that are formed in a different area of the face it is best to take a deeper look into human anatomy.
Forehead area wrinkles form as a result of different forehead muscle contractions: frontalis, procerus, and corrugator.
Those produce horizontal wrinkles across the whole forehead area, and vertical lines at the root of the nose.
Oral muscles, such as orbicularis, buccinator, depressor anguli oris, and others contribute to wrinkling around the mouth area. Those cause folds around the corners of the mouth, pull the skin at the chin area, and more.
Animating Forehead Wrinkles
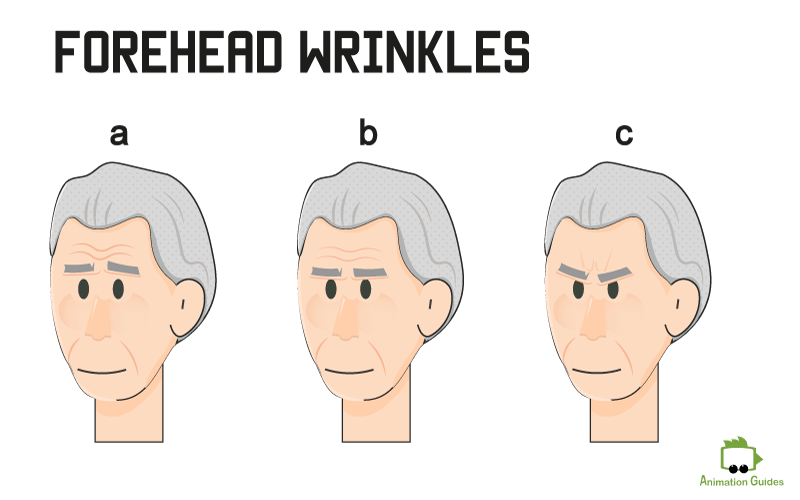
We will want the forehead wrinkles to change their appearance as the character moves the eyebrows.
When the eyebrows move up the forehead wrinkles become more pronounced while the eyebrows are lowered the horizontal wrinkles become less noticeable and the vertical ones appear.
In Design Software
1
Create a Forehead Movement cycle in the Design Software
Create a new Layer Under Each head view, name it Forehead Wrinkles.
Draw 3 states (you can add more) for wrinkles shape and position:
a. when eyebrows are raised
b. when eyebrows are neutral
c. when eyebrows are lowered
Place each wrinkles state illustration as a sublayer of the "forehead wrinkles" layer and name the layers.
In Design Software
2
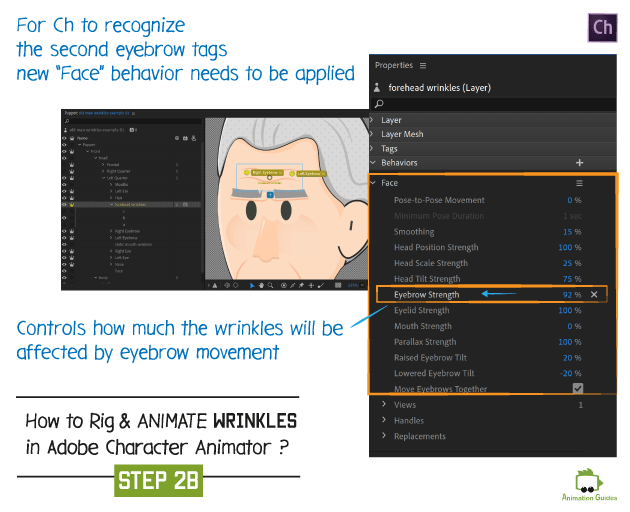
Add Eyebrow Handles and Face Behavior to the "Forehead Wrinkles" Layer
Select the "Forehead Wrinkles" Group.
Using the handle tool, add 2 handles. One above each eyebrow. Tag each handle as left eyebrow and right brow accordingly.
Go to the properties panel and add "face" behavior to the forehead wrinkles group. (This is required for the software to be able to recognize additional elements as eyebrows).
Changing the 'eyebrows strength' value in the face behavior settings will define how much the wrinkle's shape will be affected by the eyebrow's movement.
In Design Software
3
Add Layer Picker Behavior to the Forehead Wrinkles
Add a layer picker behavior to the top forehead wrinkles layer.
Set the camera mode to "right eyebrow movement".
Once in record mode, make sure the "camera input" is armed on this behavior.
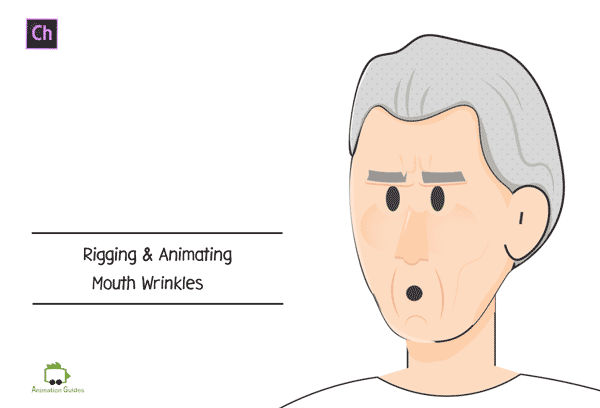
Animating Mouth Wrinkles
As the lips and jaw move and change shape, different facial wrinkles are formed. For different wrinkles to appear as the mouth changes shape the wrinkles should be attached to them. There are few ways to achieve this:
Option 01
It is possible to include the facial wrinkles together with the whole lower face area and tag everything as the mouth. This way the whole lower face will switch each time that a different mouth shape is triggered.
Option 02
In Design Software
1
Draw Different Mouth Wrinkles Combinations
Create a New Layer named "Mouth Wrinkles".
On each sublayer of the "Mouth Wrinkles" layer, add all the possible mouth wrinkles states.
In CH
2
Attach Each Wrinkle State to a Mouth Shape
Create a New Layer named "Mouth Wrinkles".
On each sublayer of the "Mouth Wrinkles" layer, add all the possible mouth wrinkles states.
Create a New Layer named “Mouth Wrinkles”.
On each sublayer of the “Mouth Wrinkles” layer, add all the possible mouth wrinkles states.
Hey!
I'm a CG artist, designer and illustrator. I love to explore different creative forms, media types and artistic styles. Feel free to write me with your ideas, suggestions or requests.
Please note, that the links that have * next to them are affiliate links and those help support AnimationGuides.com website. If you decide to purchase something through those links, we will get a small commission that will help us to continue and provide new free content on this website.
For you, going through those links is the same as clicking on a direct link. You will never pay more for products as a result of clicking on our links. If anything, that can actually help you get a better price since we can sometimes negotiate better deals for our readers.
The content on our website is not affected by the affiliate products and always reflects our honest opinion. All the reviews you will find on AnimationGuides.com are unbiased reviews. If a product we recommend does not have a supporting affiliate program, we will still link to it, just with a standard link without the *.