Although most of the characters we work with are human-like or at least move like humans, eventually we will need to animate a 4 legged character. In this post, we will cover the process of turning a static dog illustration into an animated and able to walk dog puppet in Adobe Character Animator *.

The process discussed here can be applied to many other quadruped animals: cats, lions, cows or even dinosaurs.
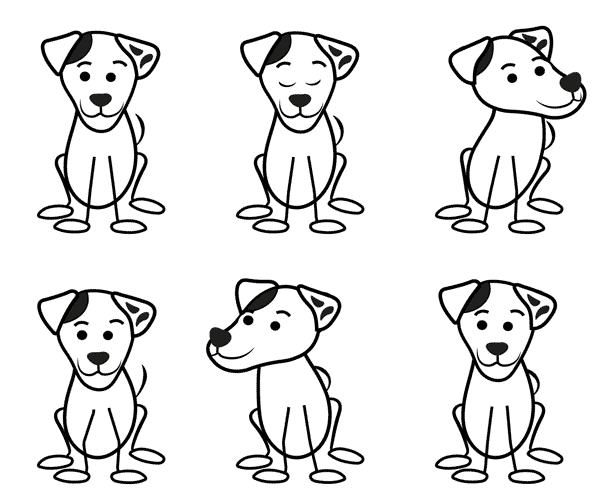
- Have a sitting pose with a head that will follow your head movements.
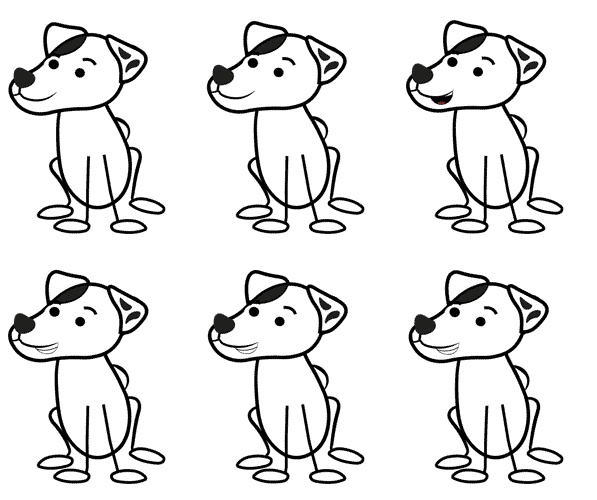
- Talk
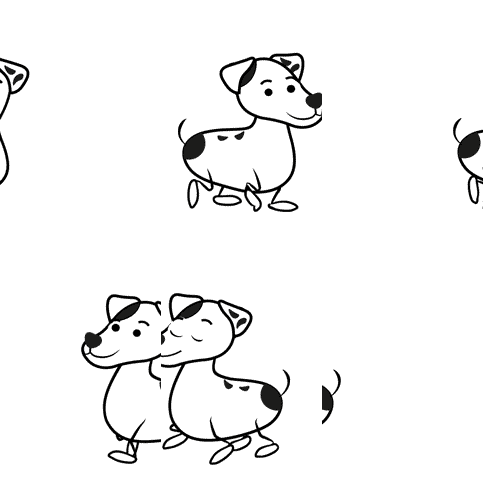
- Walk Left and Right
The Main Idea
The main difference between rigging a dog puppet to a standard puppet would be in the way we apply a walking behavior. Adobe Character Animator is not optimized for 4 leg characters and therefore we will need to apply several walk behaviors on the dog puppet’s different body parts to make it walk properly.
Follow these steps and you will have a fully working dog puppet:
Step 1: Prepare the artwork
We will need illustrations for: front static pose, left profile/right profile for walking.

All the parts that will need to move in Character Animator should have a separated art and placed on its sub-layer.
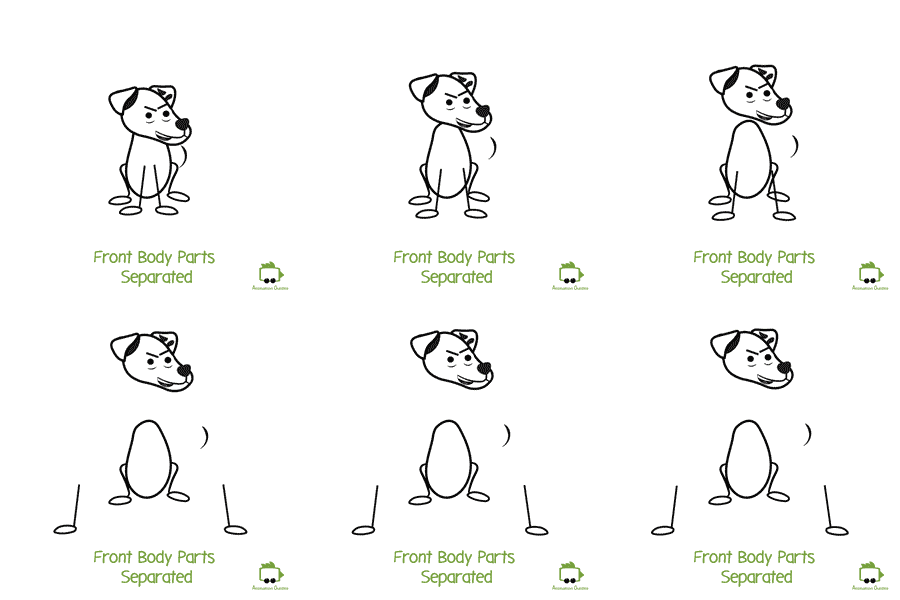

We will want the head of our dog to be expressive and therefore we will have all the facial elements on their sub-layers just like we would have with any other character.
We will need artwork for the blinks, pupils, eyeballs, brows, ears, etc.
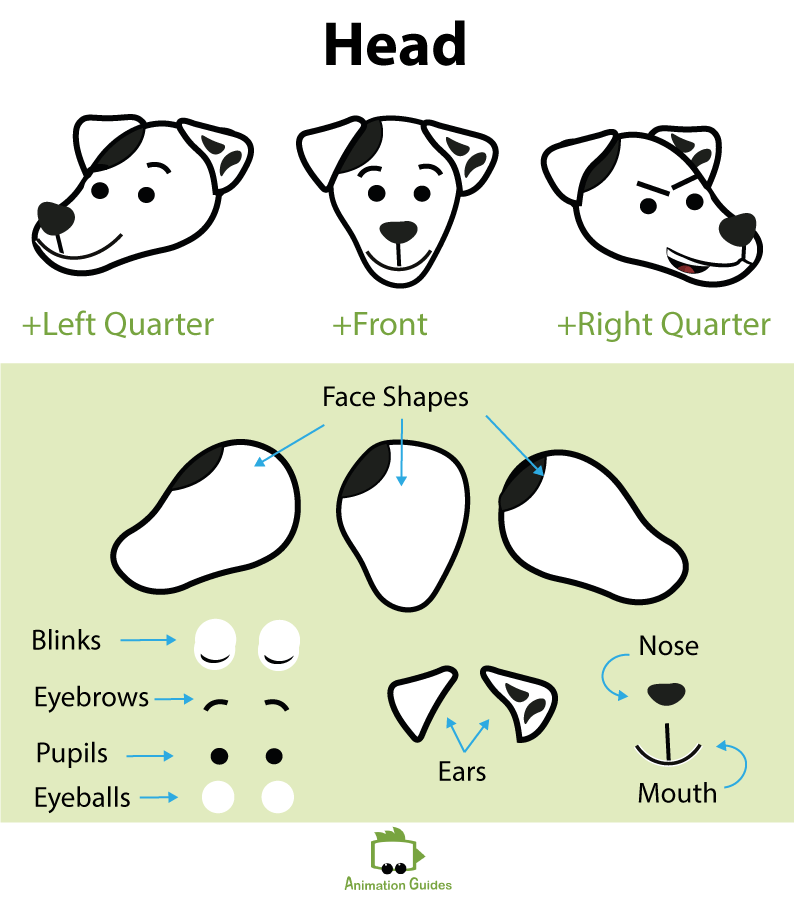
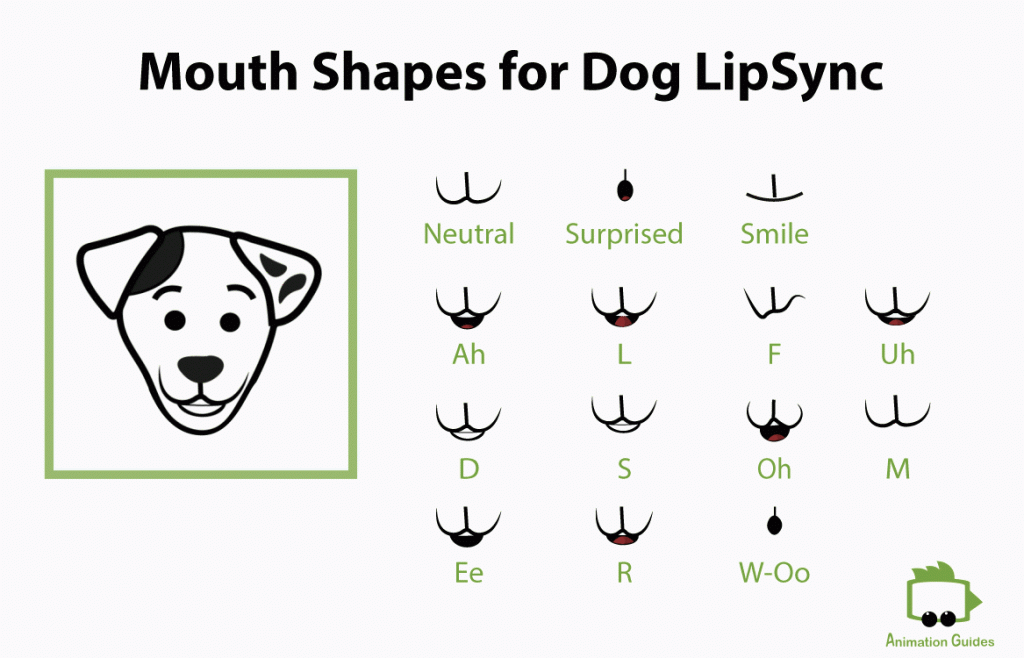
To make our dog talk we can either work with the jaw element or create different mouth shapes.
In this tutorial we will work with the mouth shapes and therefore those are the mouth shapes we will create: Neutral, Surprised, Smile, Ah, Oh, Uh, S, D, M, L, F, Ee, R, W-OO.
Step 2: Structure the artwork
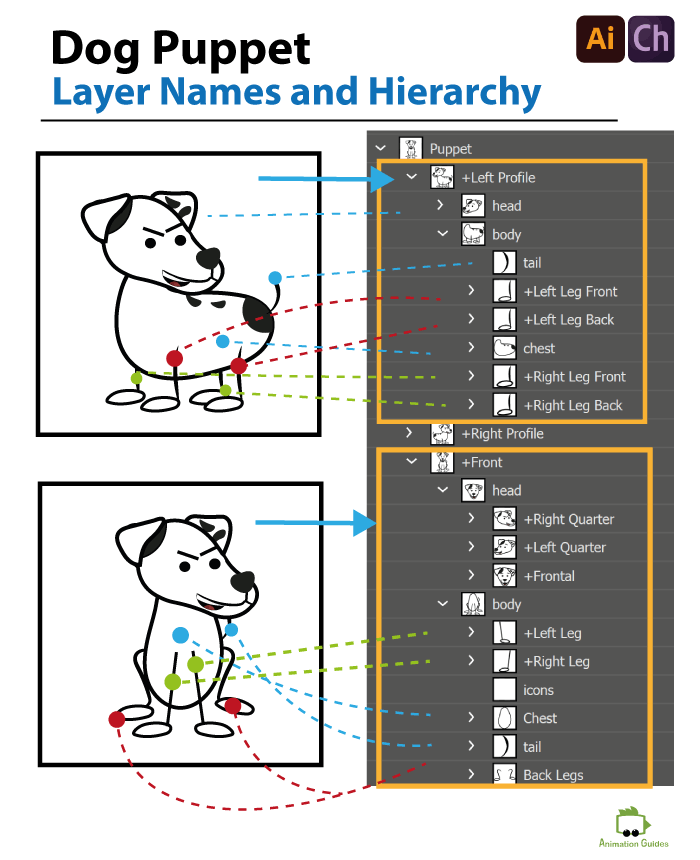
Just like creating a standard [2 arms+2 legs] puppet a dog puppet source art file should also follow a strict layer names rules and hierarchy.
Make sure all the created artworks are properly named and structured in the software you work with.
- Puppet
- +Left Profile
- +Right Profile
- +Front
- +Left Profile
- Head
- Body
- Tail
- + Left Leg Front
- + Left Leg Back
- Chest
- +Right Leg Front
- +Right Leg Back
- +Right Profile
- Head
- Body
- Tail
- +Right Leg Front
- +Right Leg Back
- Chest
- + Left Leg Front
- + Left Leg Back
- +Front
- Head
- Body
- +Right Leg
- + Left Leg
- Chest
- Back Legs
- Tail
- Head
- +Right Quarter
- +Left Quarter
- +Frontal
- +Right Quarter
- +Right Ear
- +Nose
- +Mouth
- +Right Eyebrow
- +Left Eyebrow
- +Right Eye
- Right Blink
- +Right Pupil
- Right Pupil Range
- +Left Eye
- Left Blink
- +Left Pupil
- Left Pupil Range
- Face
- +Left Ear
- +Left Quarter
- +Left Ear
- +Nose
- +Mouth
- +Right Eyebrow
- +Left Eyebrow
- +Right Eye
- Right Blink
- +Right Pupil
- Right Pupil Range
- +Left Eye
- Left Blink
- +Left Pupil
- Left Pupil Range
- Face
- +Right Ear
- +Frontal
- +Right Ear
- +Left Ear
- +Nose
- +Mouth
- +Right Eyebrow
- +Left Eyebrow
- +Right Eye
- Right Blink
- +Right Pupil
- Right Pupil Range
- +Left Eye
- Left Blink
- +Left Pupil
- Left Pupil Range
- Face

Our dog has 3 views: front, 3/4 left, 3/4 right, but it can have up to 7 views including left/right profiles and up/down head views.
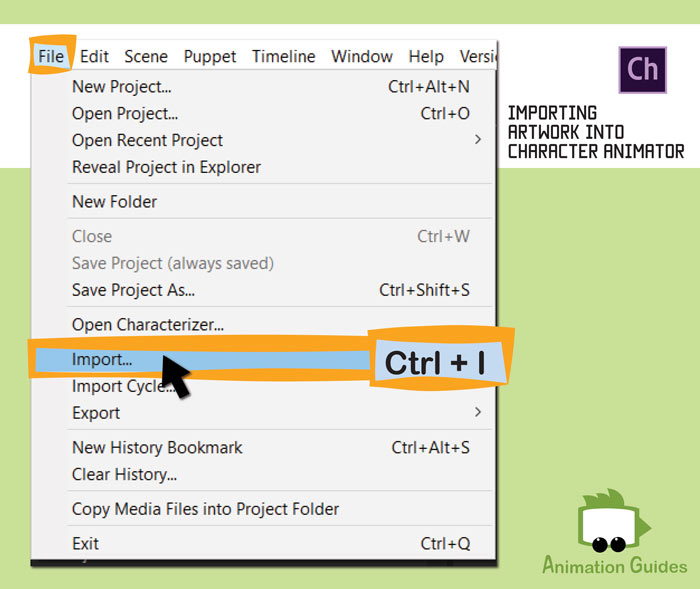
Step 3: Import the artwork file into Adobe Character Animator
Step 4: Rig the puppet in Adobe Character Animator
4.1: Make the head follow your head movement
- Open the rig window and select the puppet you just imported.
- Select all the 3 heads of your dog puppet (you can search head and all the 3 of them will show up).
- Go to the properties panel --> behavior, click on the + on the right side, and select "head turner".
- Now go to the tags area in the properties panel, open the " show tags as picture" view.
- At this stage your head should be tagged as "head", turn on the "neck" tag as well.
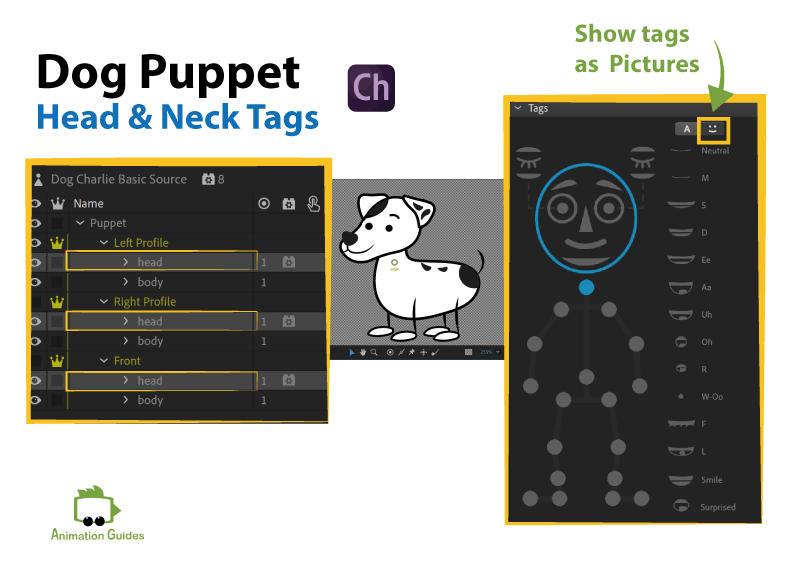
- Now select each of the heads separately, move the origin to the top of the head and use a stick tool to draw a line between the origin and dogs neck.
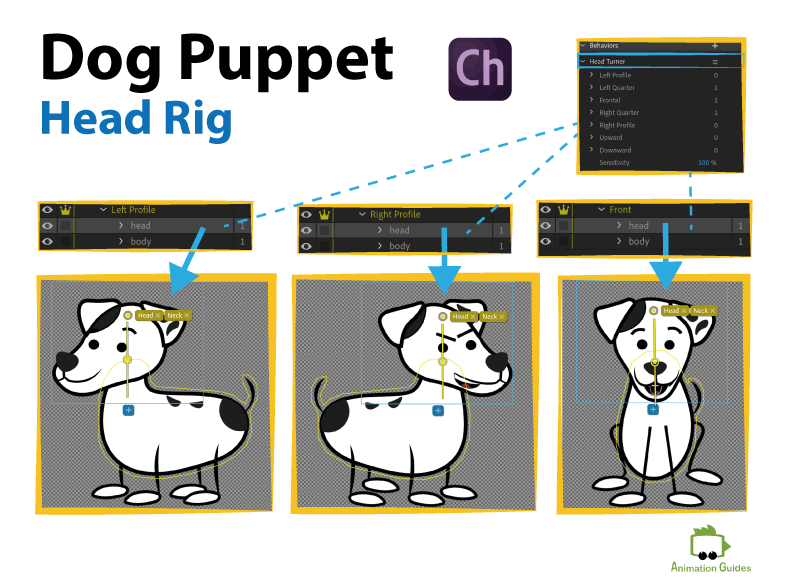
4.2: Make the dog walk
Turn on the “Left profile” and draw a leg bone structure for each of the four legs:
4.2.1 Front legs rig
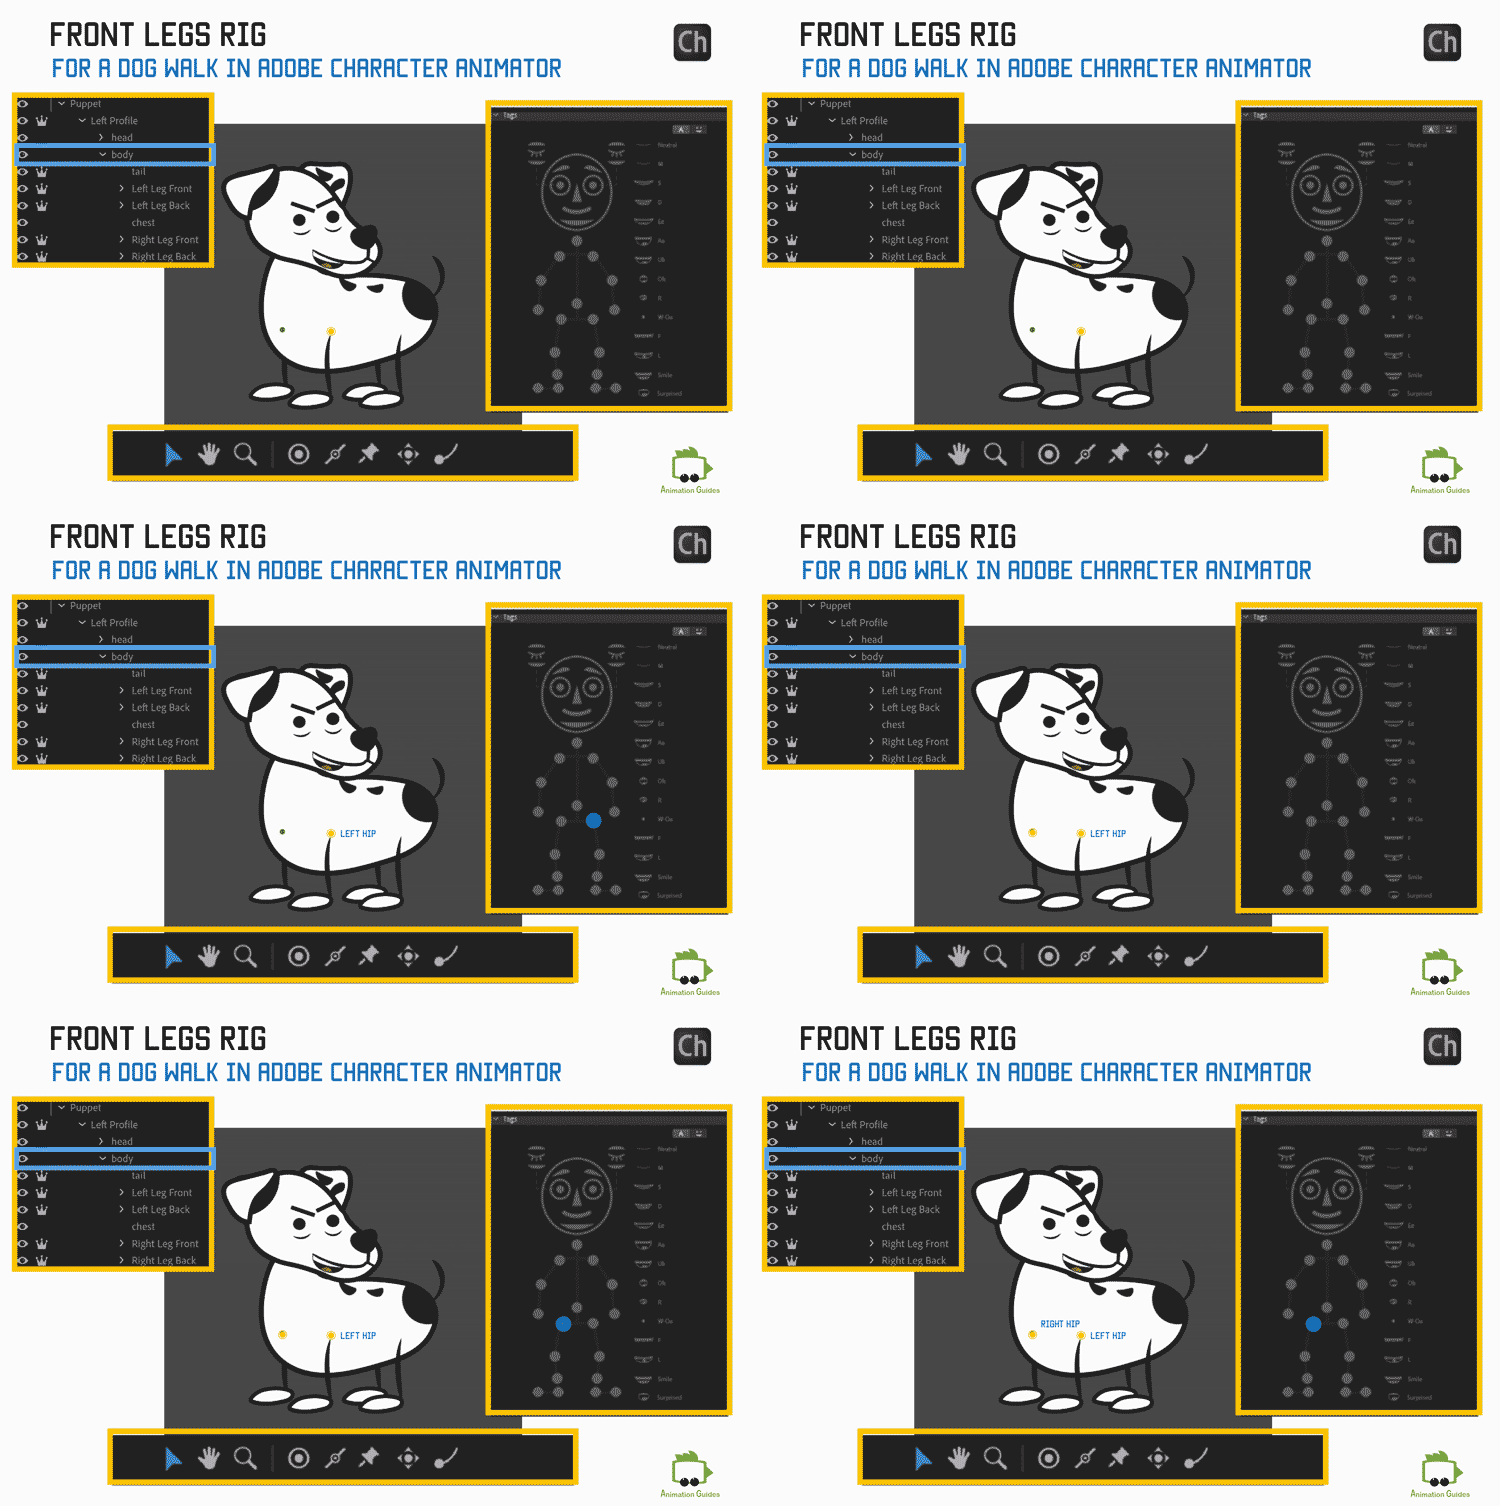
- Select the "Right Leg Front".
- Move the origin to the top of the leg (don't tag it as anything).
- Add a handle for the knee, ankle, heel, and toe, tag each of them accordingly at the tags panel.
- Use a stick tool to draw bone lines between all the handles of the leg.

- Repeat the process for the Left Front Leg.
- Now select the body and draw a handle on top of each leg, tag each handle as left/right hip.
When you select the body, you can see 2 green dots appear on it, those are the places you positioned the origins of the two front legs. Those can help you align the hip handles you just created to the left/right front leg's origins.
4.2.2 Back legs rig
The process of rigging the back legs of the dog is very similar to rigging the front legs. The main difference is in the left/right hip tag. For the back legs, we will add this tag directly on the legs and not on the body.
- Select the "Right Leg Back".
- Move the origin to the top of the leg and tag it as right hip.
- Add a handle for the knee, ankle, heel, and toe, tag each of them accordingly at the tags panel.
- Use a stick tool to draw bone lines between all the handles on the leg.
- Do the same for the Left back leg.
- Do the same (steps 4.2.1-4.2.2) for the right profile.
4.2.3 Add walk behavior to the top level of the puppet
- Now select the top puppet, and click on +, next to behaviors on the properties panel.
- Add "Limb ik" behavior, leave it "Arms and Legs".
- Now add a "walk" behavior.
- Set the mode in the walk behavior to be "Left & Right Arrow keys".

You can tweak all the other parameters later to achieve the desired movement.
If we switch to record scene now, and press arrow keys the walk will look like this.

We can see only two front legs are moving. Not exactly what we wanted, right?
That is because the walk behavior only recognizes the first right and left legs in the puppets hierarchy (in each profile view).
Character Animator is optimized for human-like puppets and therefore we need to find a workaround for a four-legged one.
To make the back legs move we need to add the walk behavior to them as well.
4.2.4 Add walk behavior to the each of the back legs
- Go Back to the Rig Mode.
- Add walk behavior to each of the back legs in left and right profiles.
- Change the mode to "Left & Right Arrow Keys".
If your puppet's hierarchy is different, you might need to apply the behavior to different legs. To check which are the legs main walk behavior applies on: go back to the top-level panel, scroll to walk behavior on the properties panel, click on the small arrow next to the handles, go to right heel (check which are the 2 right legs listed there) apply walk behavior to the rest of the right legs. Do the same for the left legs.
The dog should now be walking in place.

4.2.5 Make the dog walk in scene
To make the dog walk around the scene instead of walking in place, just change the body speed at the main walk behavior (the walk behavior we added on the top-level puppet) to the desired value. For our dog Charlie that value is 80%.


4.3: Rig the front view
- Select the front view of the puppet.
- Add hip, knee, ankle, heel, and toe handles for each of the front legs and tag them all accordingly.
- Use a stick tool to draw the bones between the handles.
- Mark the heels as "Draggable".

- Select the "Front" view, move the origin to torso area and mark it as draggable as well.
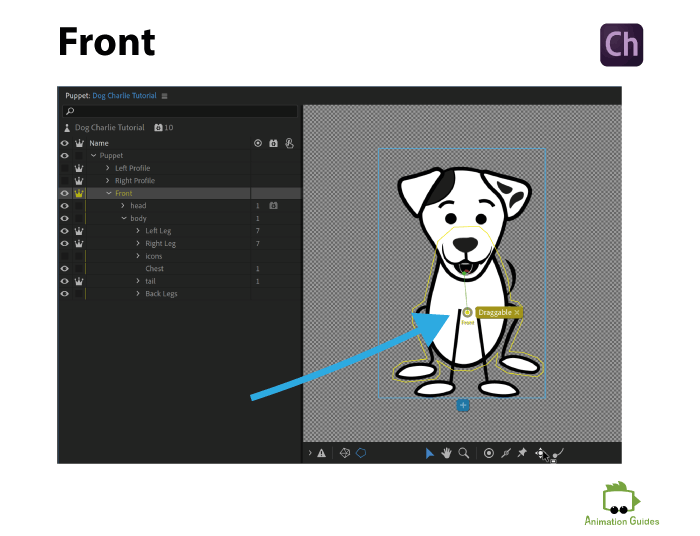
- Select the Chest. Draw a stick line on the bottom of it and mark it as fixed.

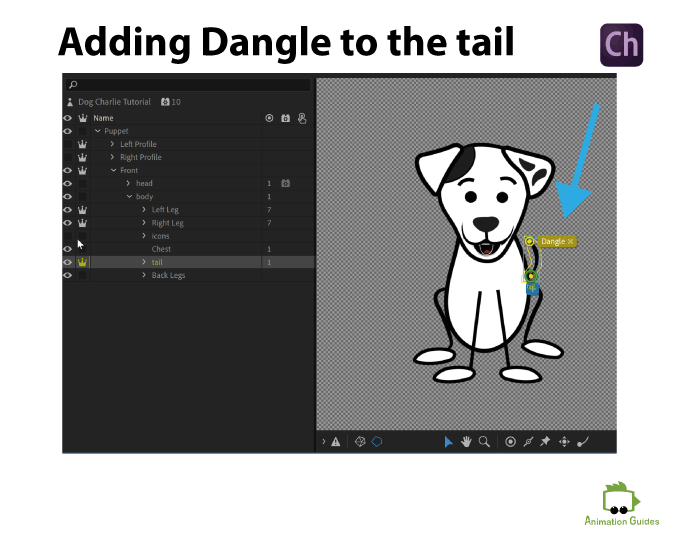
4.4: Rig the tail
- Select the tail of the puppet on the front view.
- Move the Origin of the tail to a point in which it connects to the body.
- Mark it as Fixed.
- Select a dangle tool and place a dangle point on the end of the tail.
- Do the same for the tile in left and right profiles.
4.5: Rig the ears
- Select the ear of the puppet on the front view.
- Move the Origin of the ear to the top point in which it connects to the head.
- Mark it as Fixed.
- Select a dangle tool and place a dangle point on bottom corner of the ear.
- Do the same for the right ear.
- Repeat the process for all the ears in all head view in all profiles.

Congratulations!
You now have a fully working, walking, and talking cartoon dog puppet. We didn’t do anything for the talk rig because nothing is required. If you named and stacked the mouth shape layers correctly your dog should be ready for lip-syncing. You can read about how quickly lip-sync your dog puppet here.
Now What?
Now you have a working basic dog puppet. A more advanced version of Charlie, with different accessories, facial expressions, and triggers can be downloaded for free, here.
Stay tuned for new tutorials.
Shop Related Products:
- Facebook20
- Twitter1
- Pinterest4
- Email1
- Subscribe
- 26shares


![How Small Changes in Walk Cycles Create Big Personality Shifts [Interactive Walk Cycle Simulator] walk simulator 3d](https://www.animationguides.com/wp-content/uploads/2025/04/walk-simulator-3d-250x250.jpg)
![Gil: Customizable Puppet for Adobe Character Animator [Advanced] customizable gil puppet for adobe character animator advanced rig](https://www.animationguides.com/wp-content/uploads/edd/2024/09/customizable-gil-puppet-for-adobe-character-animator-advanced-rig-250x250.png)
![Gael- Male Puppet for Adobe Character Animator [Advanced] download gael advanced parallax puppet for adobe character animator](https://www.animationguides.com/wp-content/uploads/edd/2023/04/download-gael-advanced-parallax-puppet-for-adobe-character-animator-250x250.png)
Dr Katia, this is awesome! Has there been any new features or methods for animating a 4-legged character? Many thanks again!!!!!
Mark Hi,
Thank you for the positive feedback. The method described in the post is the one I currently use for quadrupeds. But Character Animator Software is constantly developing, so I believe there will be some dedicated ways to do this, somewhere in the near future. Right now, this “workaround” is the best I know of.